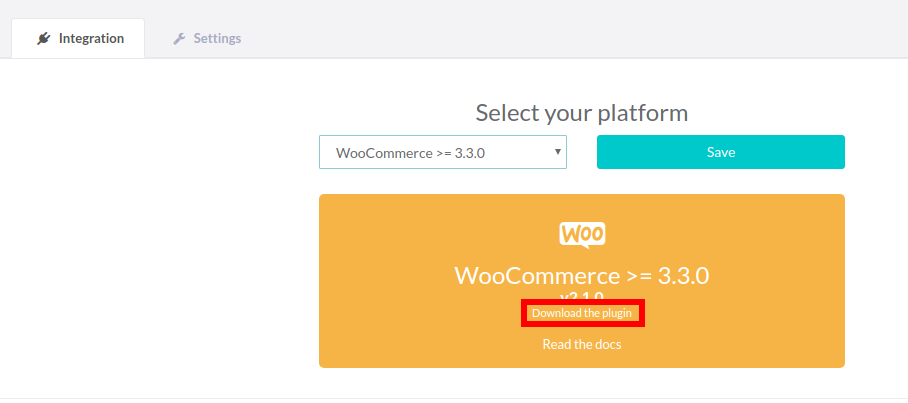
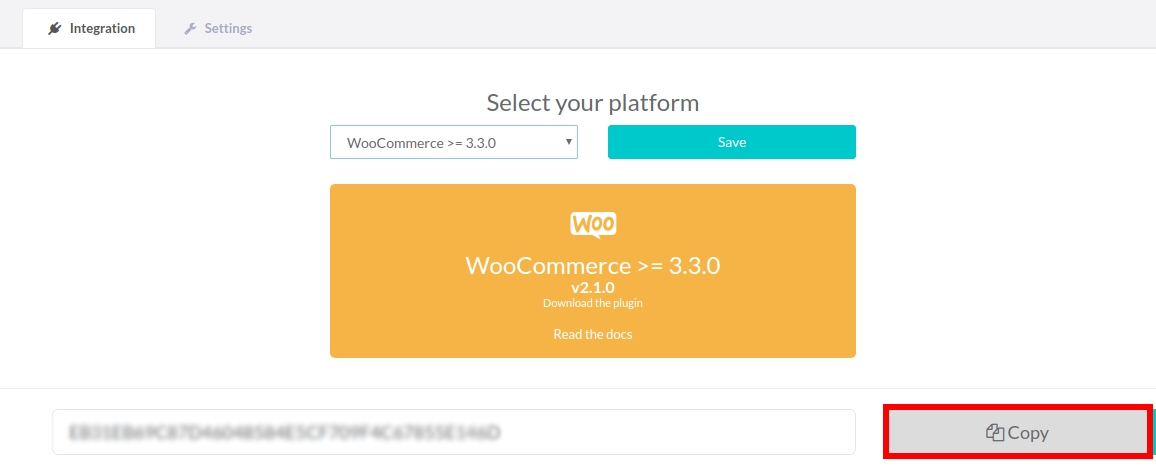
Download the latest version of the Woocommerce module
You can download the latest version of the Woocommerce module by going to My Account -> Integration -> Select Woocommerce -> click Download the plugin.
Installing the module
To install the Transactionale plugin, you need to log in to the backend of your website and go to the Plugin section:
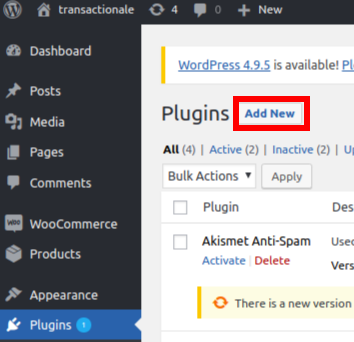
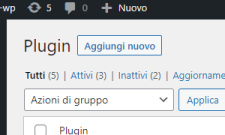
Click “Add new”
Click “Upload Plugin”
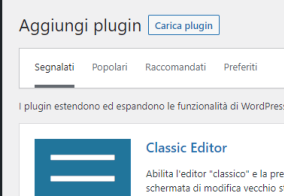
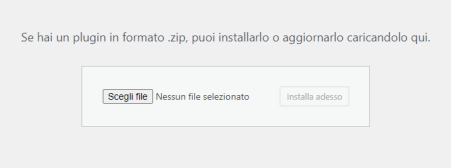
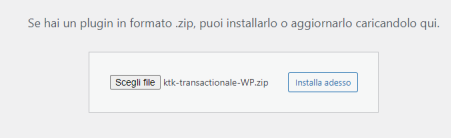
Upload the plugin’s zip file by clicking on the “Choose file” button
Then click “Install Now”
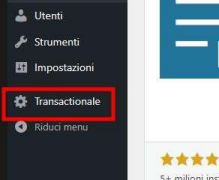
After installing the plugin, the “Transactionale” field will be added to the sidebar
After installation, you will move on to the module configuration.
Wordpress module configuration
The following page will appear in Transactionale’s configuration process:

Let’s take a look at each field to choose the desired settings:
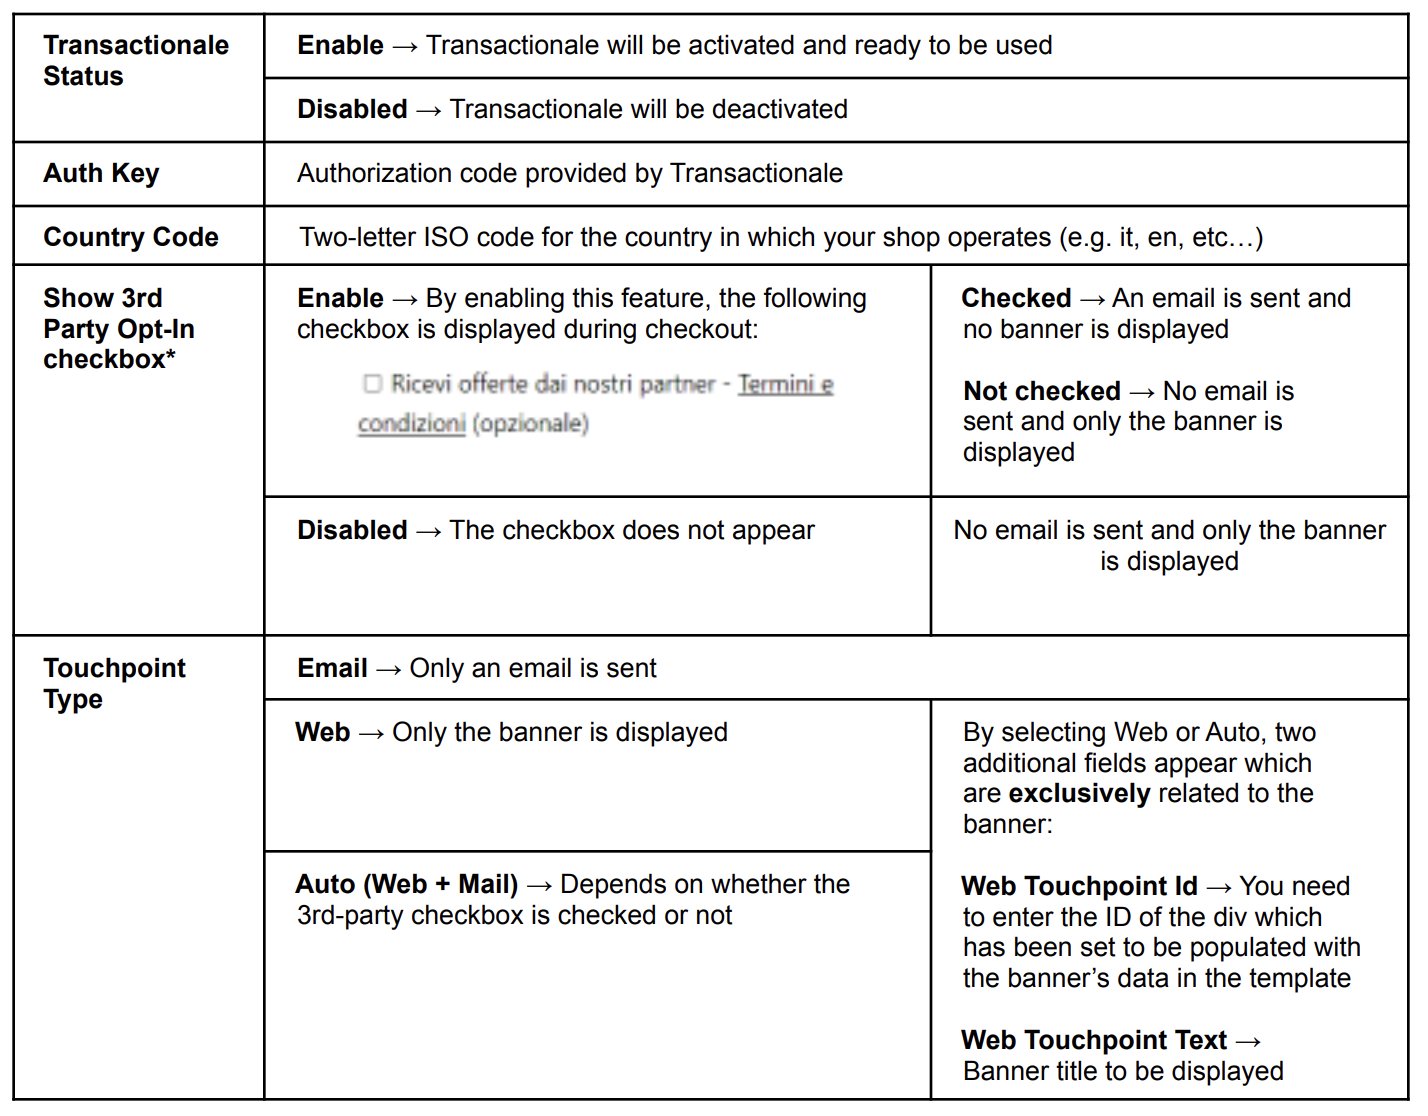
Transactionale Status
- Enable → Transactionale will be activated and ready to be used;
- Disabled → Transactionale will be deactivated.
Auth Key Authorization code provided by Transactionale to identify your account
Country Code Two-letter ISO code for the country in which your shop operates (e.g. it, en, etc…)
Show 3rd Party Opt-In checkbox
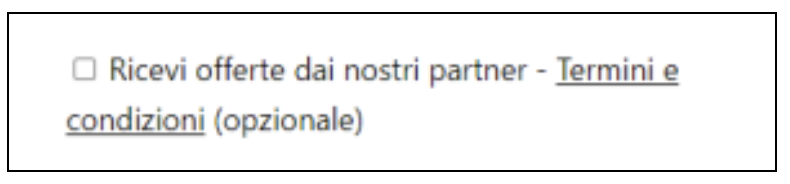
- Enable → By enabling this feature, the following checkbox is displayed during checkout:
- What happens if the acceptance box is checked: An email is sent while the banner is not displayed;
-
What happens if the acceptance box is NOT checked: No email is sent and only the banner is displayed
-
Disabled → The checkbox does not appear during checkout; by default, no email is sent and only the banner is displayed.
- This feature is specific to Wordpress.
Touchpoint Type From the drop-down menu, you can choose one of the following touchpoints to deliver offers to your customers:
- Email → Only an email related to the special offers will be sent;
- Web → Only a banner related to the special offers will be displayed on the website;
- Auto (Web + Mail) → This field depends on what users choose in the 3rd party opt-in checkbox.
Only by selecting Web and Auto, two additional fields appear which are exclusively related to the banner:
- Web Touchpoint Id → You need to enter the ID of the div which has been set to be populated with the banner’s data in the template;
- Web Touchpoint Text → Banner title to be displayed – “Special offers reserved for you”, in this case.

Summary
*Only for Wordpress
Last steps
Copy your Auth Key from your Transactionale account under My Account-> Integration and paste into the Auth Key field in the configuration page of the WooCommerce plugin.
Verify integration
You can verify the correct functioning of the technological integration and the webhook url by following these simple instructions: